
请注意,本文编写于 2132 天前,最后修改于 2132 天前,其中某些信息可能已经过时。
题目:
(1) 硬盘的配置要求
- 新建一个20GB的虚拟硬盘,添加至
serverA - 创建
lvm物理卷- 使用新增加的硬盘创建一个名为
datastore的卷组, 卷组的PE尺寸为16MB; - 逻辑卷的名称为
database所属卷组为datastote,该逻辑卷大小为8GB; - 将新建的逻辑卷
database格式化为XFS文件系统,编辑配置文件实现以UUID的形式将逻辑卷开机自动挂载至/data/web_data目录
- 使用新增加的硬盘创建一个名为
实现方法
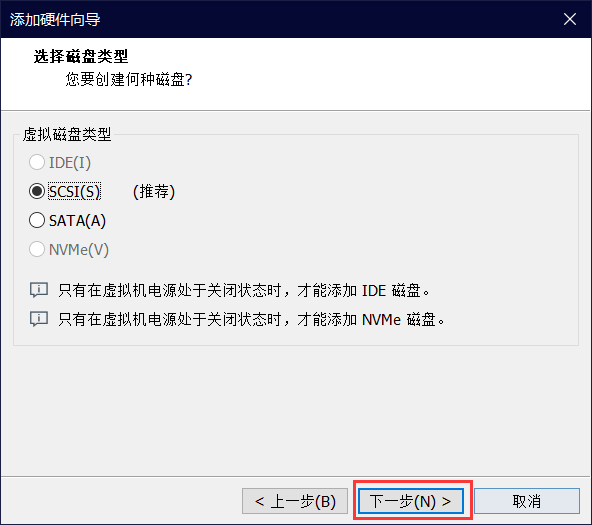
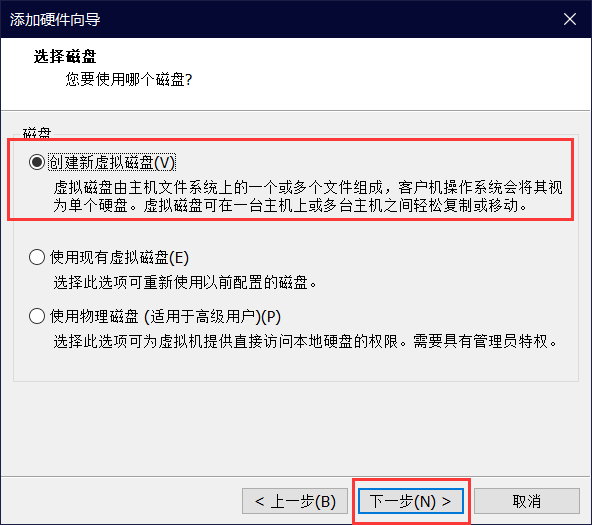
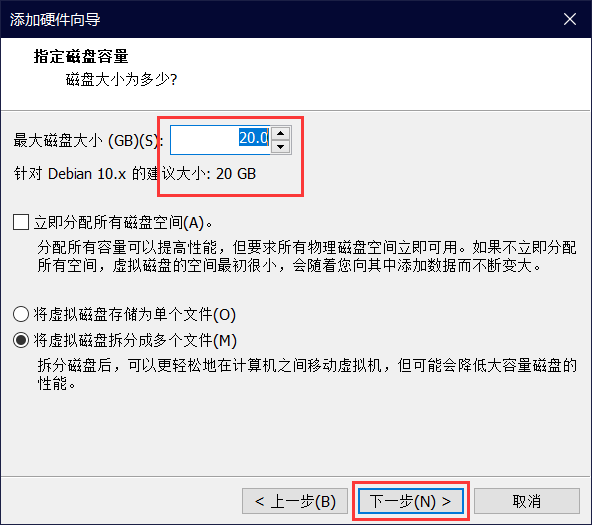
新增虚拟硬盘
首先在VMware中为debian添加一块20GB的虚拟硬盘


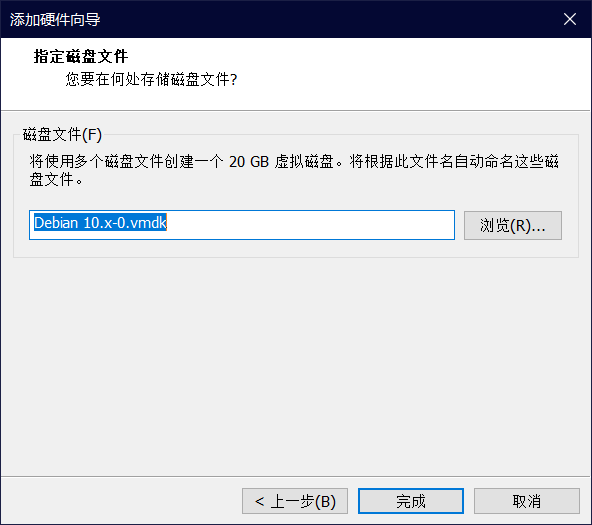
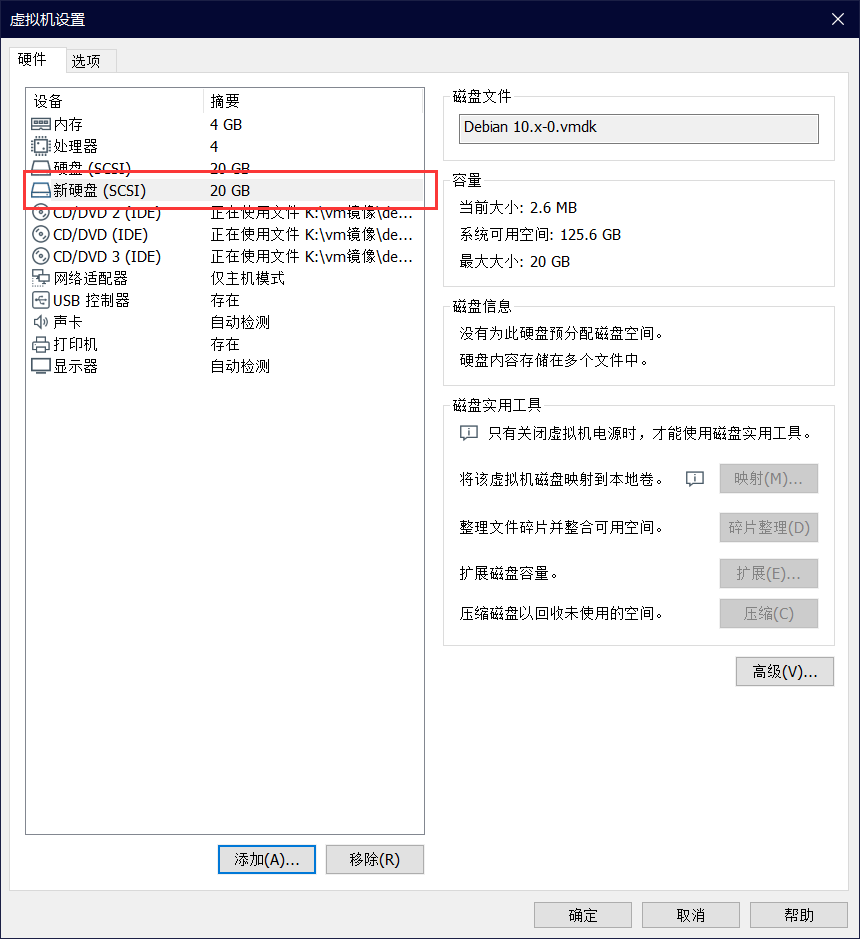
添加完成后点击 确定后重启该虚拟机
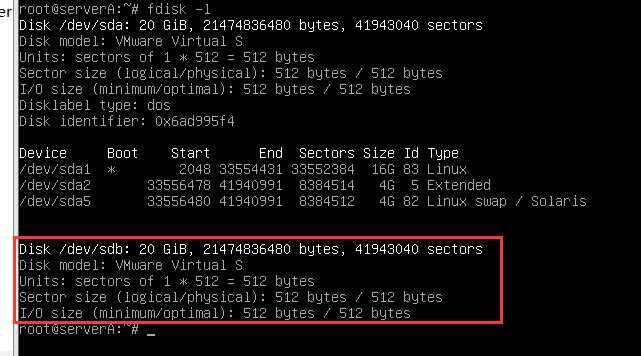
root@serverA:~# reboot创建lvm物理卷
重启完成后使用 fdisk -l查看新加入的硬盘
首先创建两个卷
root@serverA:~# fdisk /dev/sdb

Welcome to fdisk (util-linux 2.33.1).
Changes will remain in memory only, until you decide to write them.
Be careful before using the write command.

Device does not contain a recognized partition table.
Created a new DOS disklabel with disk identifier 0x220ea77d.

Command (m for help): n #新建卷
Partition type
   p   primary (0 primary, 0 extended, 4 free)
   e   extended (container for logical partitions)
Select (default p): p   #选择分区类型 p为主分区
Partition number (1-4, default 1): 1    #分区号 从1开始
First sector (2048-41943039, default 2048): #此处直接回车跳过
Last sector, +/-sectors or +/-size{K,M,G,T,P} (2048-41943039, default 41943039): +8G #为该卷+8G容量

Created a new partition 1 of type 'Linux' and of size 8 GiB.

Command (m for help): n #以下同上
Partition type
   p   primary (1 primary, 0 extended, 3 free)
   e   extended (container for logical partitions)
Select (default p): p
Partition number (2-4, default 2): 2
First sector (16779264-41943039, default 16779264):
Last sector, +/-sectors or +/-size{K,M,G,T,P} (16779264-41943039, default 41943039): +8G

Created a new partition 2 of type 'Linux' and of size 8 GiB.

Command (m for help):
接下来将刚才创建的两个卷修改为 lvm格式
Command (m for help): t #修改卷类型 t=type
Partition number (1,2, default 2): 1    #选择卷号
Hex code (type L to list all codes): L  #列出所有类型

 0  Empty           24  NEC DOS         81  Minix / old Lin bf  Solaris
 1  FAT12           27  Hidden NTFS Win 82  Linux swap / So c1  DRDOS/sec (FAT-
 2  XENIX root      39  Plan 9          83  Linux           c4  DRDOS/sec (FAT-
 3  XENIX usr       3c  PartitionMagic  84  OS/2 hidden or  c6  DRDOS/sec (FAT-
 4  FAT16 <32M      40  Venix 80286     85  Linux extended  c7  Syrinx
 5  Extended        41  PPC PReP Boot   86  NTFS volume set da  Non-FS data
 6  FAT16           42  SFS             87  NTFS volume set db  CP/M / CTOS / .
 7  HPFS/NTFS/exFAT 4d  QNX4.x          88  Linux plaintext de  Dell Utility
 8  AIX             4e  QNX4.x 2nd part 8e  Linux LVM       df  BootIt
 9  AIX bootable    4f  QNX4.x 3rd part 93  Amoeba          e1  DOS access
 a  OS/2 Boot Manag 50  OnTrack DM      94  Amoeba BBT      e3  DOS R/O
 b  W95 FAT32       51  OnTrack DM6 Aux 9f  BSD/OS          e4  SpeedStor
 c  W95 FAT32 (LBA) 52  CP/M            a0  IBM Thinkpad hi ea  Rufus alignment
 e  W95 FAT16 (LBA) 53  OnTrack DM6 Aux a5  FreeBSD         eb  BeOS fs
 f  W95 Ext'd (LBA) 54  OnTrackDM6      a6  OpenBSD         ee  GPT
10  OPUS            55  EZ-Drive        a7  NeXTSTEP        ef  EFI (FAT-12/16/
11  Hidden FAT12    56  Golden Bow      a8  Darwin UFS      f0  Linux/PA-RISC b
12  Compaq diagnost 5c  Priam Edisk     a9  NetBSD          f1  SpeedStor
14  Hidden FAT16 <3 61  SpeedStor       ab  Darwin boot     f4  SpeedStor
16  Hidden FAT16    63  GNU HURD or Sys af  HFS / HFS+      f2  DOS secondary
17  Hidden HPFS/NTF 64  Novell Netware  b7  BSDI fs         fb  VMware VMFS
18  AST SmartSleep  65  Novell Netware  b8  BSDI swap       fc  VMware VMKCORE
1b  Hidden W95 FAT3 70  DiskSecure Mult bb  Boot Wizard hid fd  Linux raid auto
1c  Hidden W95 FAT3 75  PC/IX           bc  Acronis FAT32 L fe  LANstep
1e  Hidden W95 FAT1 80  Old Minix       be  Solaris boot    ff  BBT
Hex code (type L to list all codes): 8e #8e对应所有类型中的lvm格式

Changed type of partition 'Linux' to 'Linux LVM'.

Command (m for help): t #以下同上
Partition number (1,2, default 2): 2
Hex code (type L to list all codes): 8e

Changed type of partition 'Linux' to 'Linux LVM'.

Command (m for help):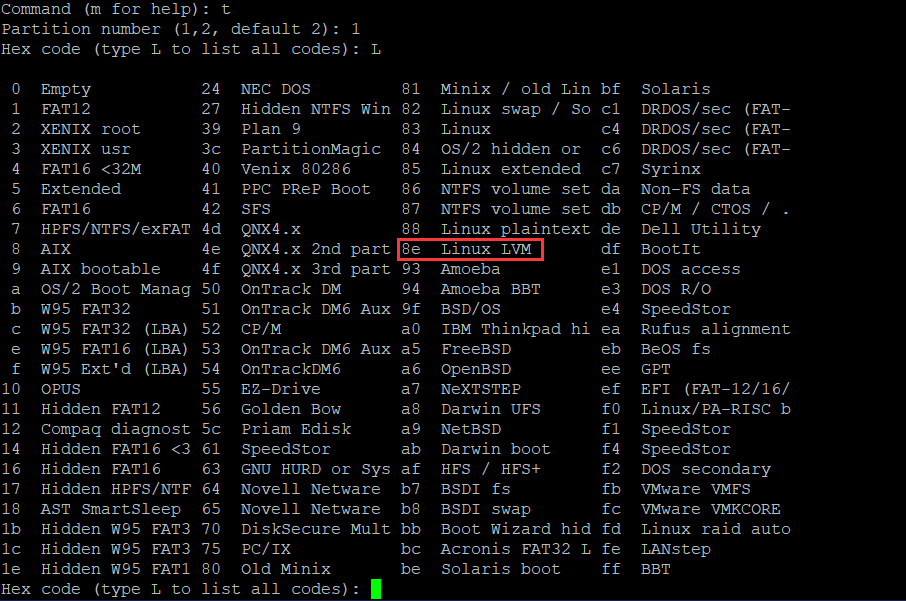
使用 p查看我们所创建的卷
Command (m for help): p
Disk /dev/sdb: 20 GiB, 21474836480 bytes, 41943040 sectors
Disk model: VMware Virtual S
Units: sectors of 1 * 512 = 512 bytes
Sector size (logical/physical): 512 bytes / 512 bytes
I/O size (minimum/optimal): 512 bytes / 512 bytes
Disklabel type: dos
Disk identifier: 0x220ea77d

Device     Boot    Start      End  Sectors Size Id Type
/dev/sdb1           2048 16779263 16777216   8G 8e Linux LVM
/dev/sdb2       16779264 33556479 16777216   8G 8e Linux LVM

Command (m for help):
确认无误后使用 wq写入并退出
Command (m for help): wq
The partition table has been altered.
Calling ioctl() to re-read partition table.
Syncing disks.

root@serverA:~#
创建卷组
安装 lvm2
root@serverA:~# apt install lvm2安装完成后根据题目要求创建vg卷组
root@serverA:~# vgcreate -s 16MiB datastore /dev/sdb1 /dev/sdb2
  Physical volume "/dev/sdb1" successfully created.
  Physical volume "/dev/sdb2" successfully created.
  Volume group "datastore" successfully created
root@serverA:~#
-s 16MiB指定PE尺寸为16MB
datastore为卷组名称
创建逻辑卷
接下来创建所属卷组为 datastore的名为 database逻辑卷
root@serverA:~# lvcreate -L 8G -n database datastore
  Logical volume "database" created.
root@serverA:~#
-L 8G 指定逻辑卷大小
-n database 指定逻辑卷名称
datastore 卷组名称
使用 vgdisplay查看卷组详细信息 <此处不做演示>
使用 lvdisplay查看逻辑卷详细信息 <此处不做演示>
格式化XFS分区
安装 xfsprogs
root@serverA:~# apt install xfsprogs
Reading package lists... Done
Building dependency tree
Reading state information... Done
Suggested packages:
  xfsdump acl attr quota
The following NEW packages will be installed:
  xfsprogs
0 upgraded, 1 newly installed, 0 to remove and 0 not upgraded.
Need to get 0 B/909 kB of archives.
After this operation, 3,429 kB of additional disk space will be used.
Get:1 cdrom://[Debian GNU/Linux 10.5.0 _Buster_ - Official amd64 DVD Binary-1 20200801-11:35] buster/main amd64 xfsprogs amd64 4.20.0-1 [909 kB]
Selecting previously unselected package xfsprogs.
(Reading database ... 27637 files and directories currently installed.)
Preparing to unpack .../xfsprogs_4.20.0-1_amd64.deb ...
Unpacking xfsprogs (4.20.0-1) ...
Setting up xfsprogs (4.20.0-1) ...
update-initramfs: deferring update (trigger activated)
Processing triggers for man-db (2.8.5-2) ...
Processing triggers for libc-bin (2.28-10) ...
Processing triggers for initramfs-tools (0.133+deb10u1) ...
update-initramfs: Generating /boot/initrd.img-4.19.0-10-amd64
root@serverA:~#
将逻辑卷格式化为 xfs文件系统
root@serverA:~# mkfs.xfs /dev/datastore/database
meta-data=/dev/datastore/database isize=512    agcount=4, agsize=524288 blks
         =                       sectsz=512   attr=2, projid32bit=1
         =                       crc=1        finobt=1, sparse=1, rmapbt=0
         =                       reflink=0
data     =                       bsize=4096   blocks=2097152, imaxpct=25
         =                       sunit=0      swidth=0 blks
naming   =version 2              bsize=4096   ascii-ci=0, ftype=1
log      =internal log           bsize=4096   blocks=2560, version=2
         =                       sectsz=512   sunit=0 blks, lazy-count=1
realtime =none                   extsz=4096   blocks=0, rtextents=0
root@serverA:~#
使用UUID挂载至指定目录
创建题目要求的 /data/web_data目录
root@serverA:~# mkdir -p /data/web_data使用 blkid查看UUID
root@serverA:~# blkid /dev/datastore/database
/dev/datastore/database: UUID="a252c83b-2b85-4ef3-b611-4a4e72917bf1" TYPE="xfs"
root@serverA:~#
复制UUID后编辑 /etc/fstab
末行添加
UUID=a252c83b-2b85-4ef3-b611-4a4e72917bf1 /data/web_data xfs defaults 0 0添加完成后为下图
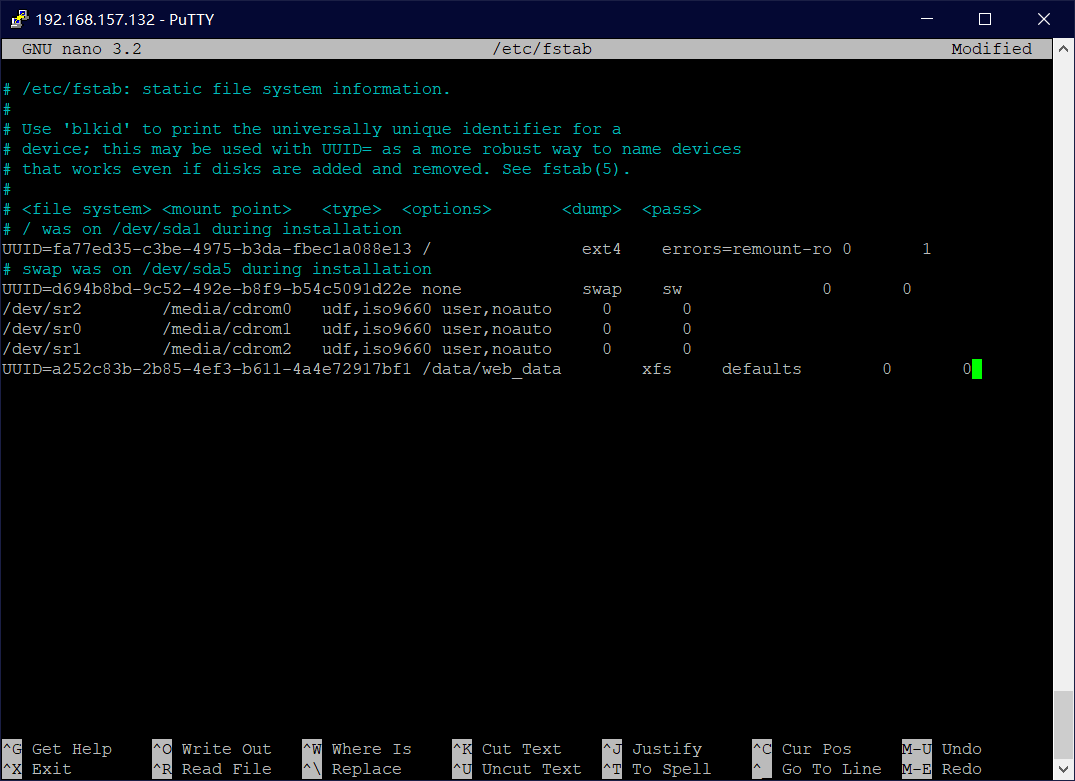
保存 ctrl+o 退出 ctrl+x
挂载完成!
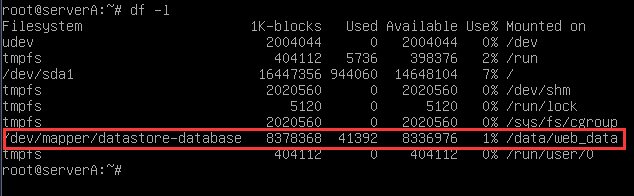
重启后使用 df -l 既可看到已经挂载成功!
版权属于:DeepFal
本文链接:https://blog.deepfal.cn/index.php/archives/350/
转载时须注明出处及本声明
